Introduction
WordPress is one of the most famous content management systems (CMS). According to the latest statistical data nearly 22.5% of all existing sites around the world run on WP. This system is often chosen as it is:
- Easy to install, run and modify.
- Free.
- Rich in free templates, themes, and plugins.
- SEO friendly.
- Simple to control and manage.
- Secure in use.
Using a CDN with WordPress will significantly improve loading speed. Below, we're going to give you detailed instructions how to integrate CDN with WP.
Before you start
- Since we will use the Cname address next, please ensure that you have configured the CDN resources on the console .
- If you want to integrate a CDN service on https:// pages, you must ensure that SSL is enabled on the console.
- If your website has embedded custom fonts, please confirm that you have enabled the CORS headers in the LightCDN console.
Integration approach
Enable CDN in WORDPRESS using W3 TOTAL CACHE PLUGIN
Installation Of CDN Plugin
Login to the Wordpress Admin Panel.
Navigate to Plugin page then click on Add New.
Insert W3 Total Cache into the search field.
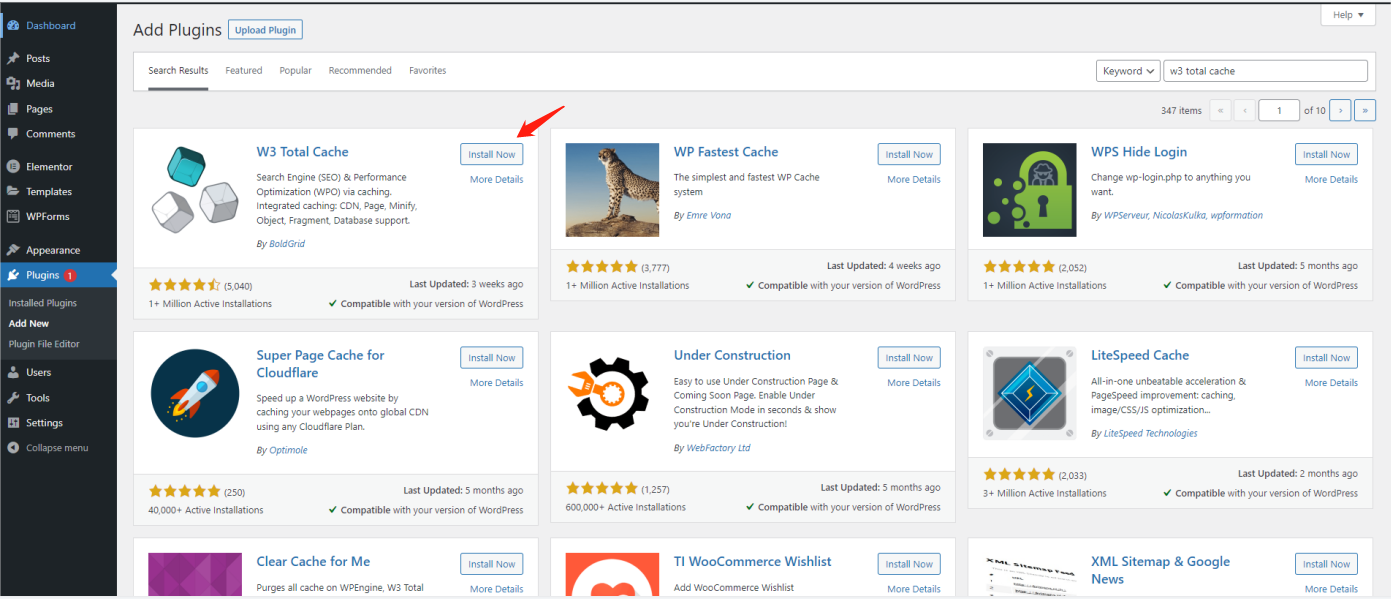
Install W3 Total Cache and activate it.

Migrate Contents to CDN
Open the Settings page of the CDN plugin from the Plugin page.
Under General Settings page, scroll down to CDN Delivery Network, tick to enable and choose CDN Type as Generic Mirror.(Don't tick Enable and select Generic Mirror from the CDN type select box as in the picture below.)Save changes.
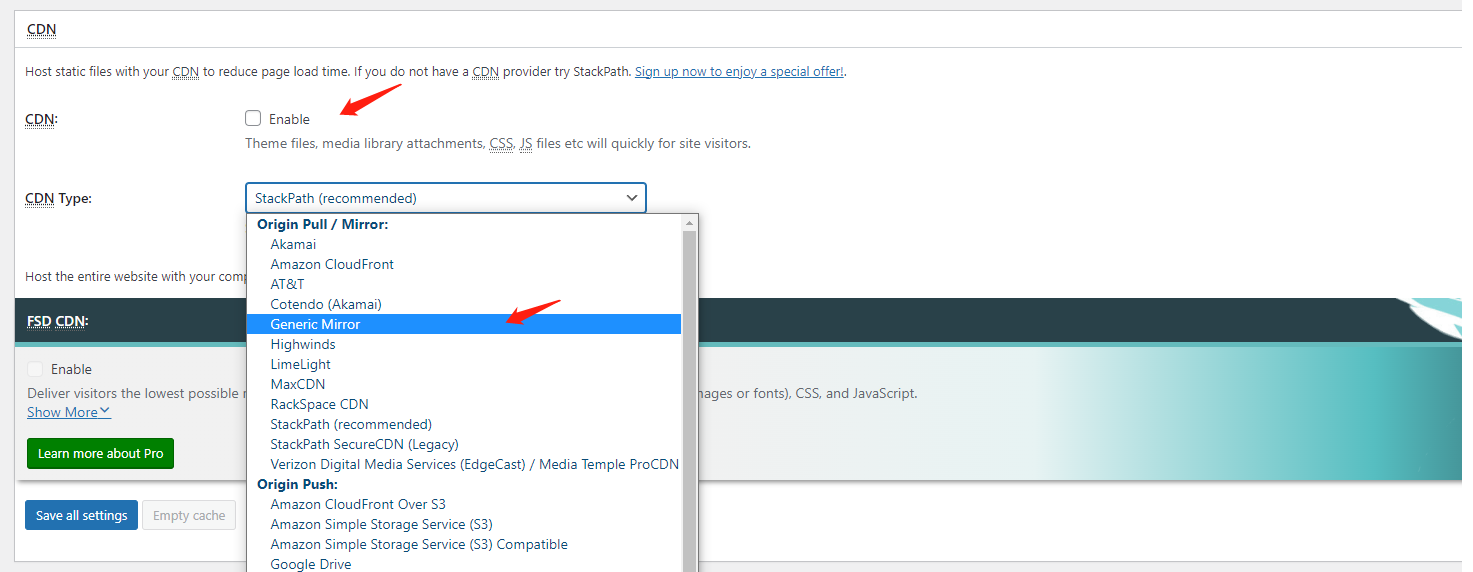
Select Content Delivery Network (CDN) Setting from the Performance menu of Viewing.
Insert the CDN URL into Replace site's hostname with CNAME(You can copy in the "CDN Resources" list of LightCDN console.).Save changes.

Return to the "General Settings" page and check "CDN ->enabled".Save changes.
Activate the changes on General Settings Page.
Enable CDN in WORDPRESS using WP SUPER CACHE PLUGIN
Installation Of CDN Plugin
Login to the Wordpress Admin Panel.
Navigate to Plugin page then click on Add New.
Insert WP Super Cache into the search field.
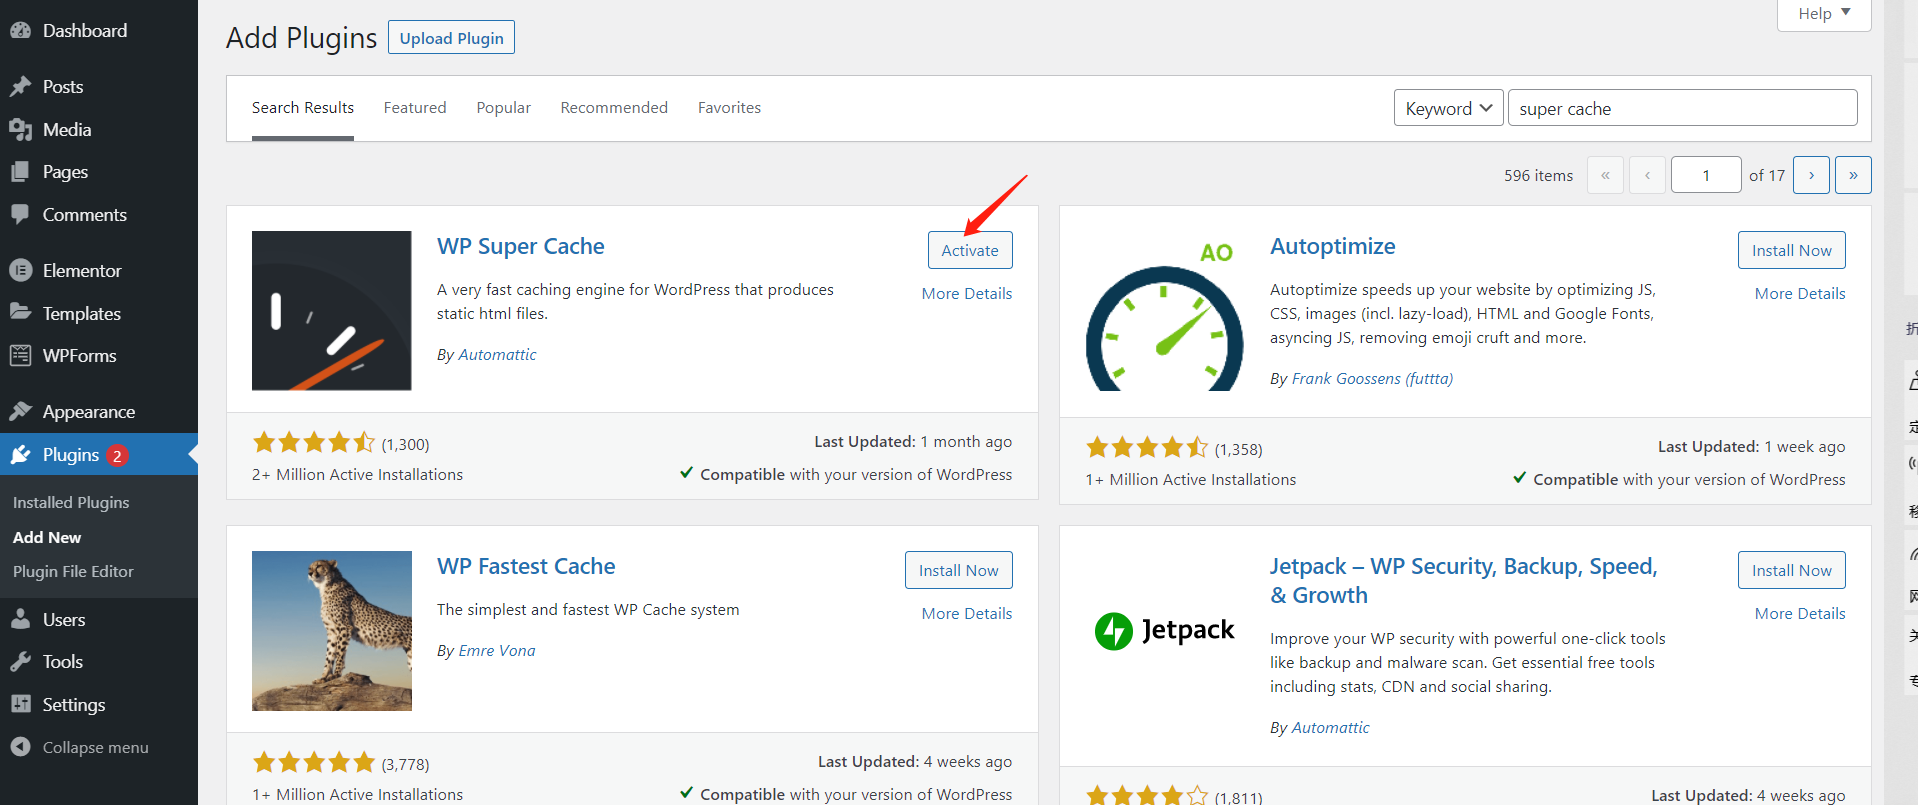
Install W3 Total Cache and activate it.

Migrate Contents to CDN
Open the Settings page of the CDN plugin from the Plugin page.
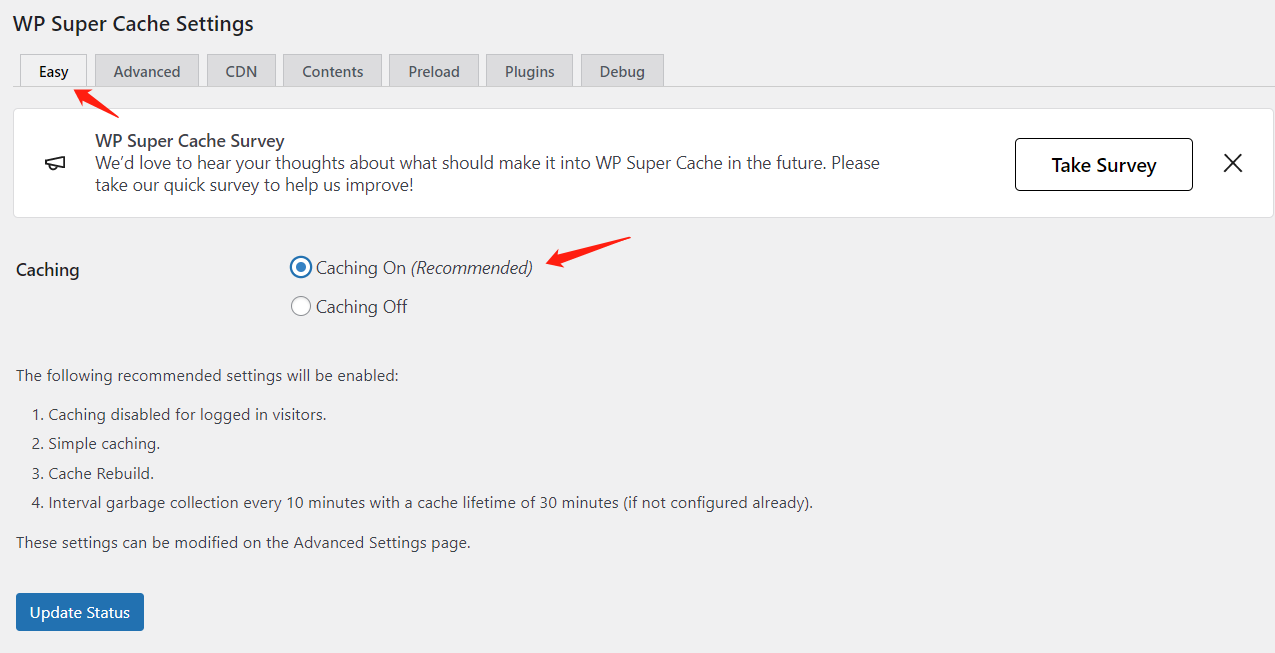
Under the Easy tab, tick Caching On(Recommended) in the Caching setting.Update status.
Switch to the CDN tab, tick the Enable CDN Support check box and to the Off-site URL input field fill in your CDN domain as in the picture below.
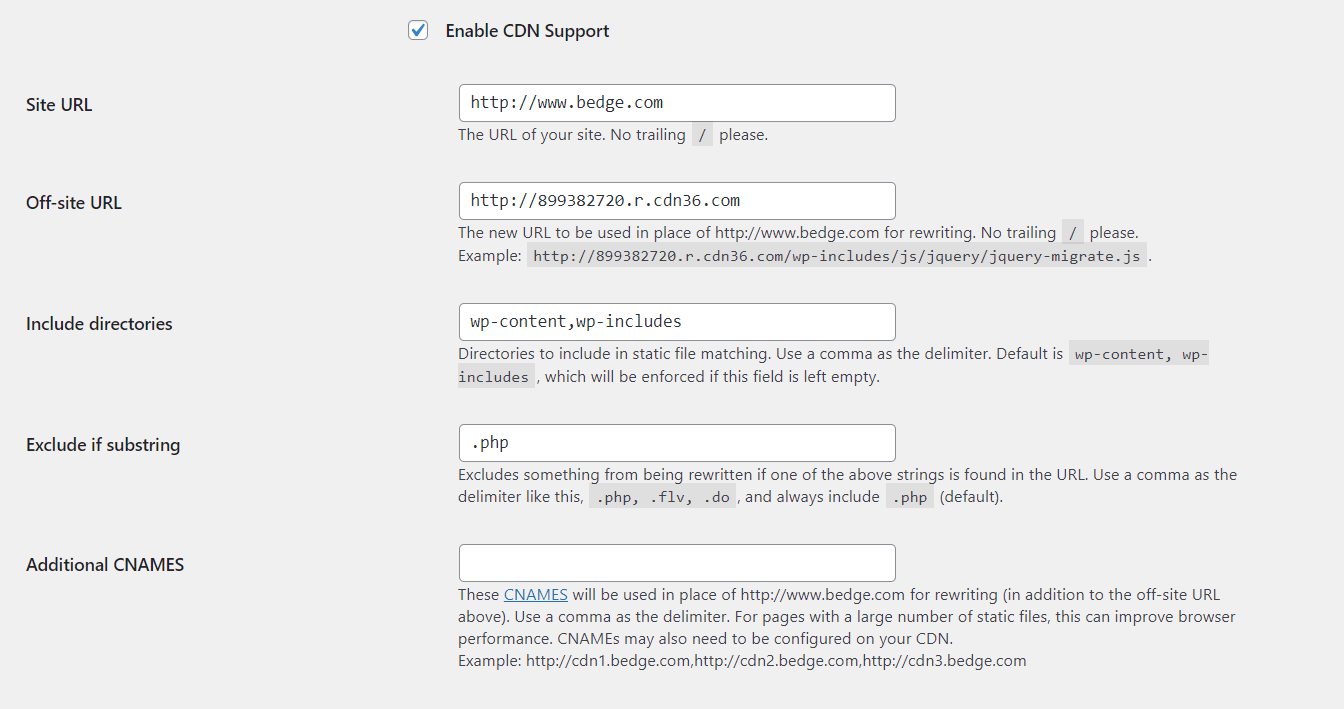
If you don’t have SSL enabled for the CDN service tick the check box Skip https URLs to avoid "mixed content" errors. Save changes.
Activate the changes on General Settings Page.
Verification
Verify if your Wordpress blog is on CDN by viewing the HTML source code. Image links should be replaced with CDN URLs.